Saturday, August 28, 2010

First roadbed and track In place

I've chosen a commercial product called Homa-Bed (made from Homasote) for the roadbed.  Where track will not be seen when the scenery is complete, I use Atlas code 100, while exposed track is Peco code 83.  The "code" refers to the rail size, 100 being larger and more forgiving (good for hard-to-reach areas) and 83 being smaller and more to scale.  The Peco brand is also much more realistic looking and of better construction.


Both the roadbed and track are glued in place with adhesive calk.  Canned veggies make great weights!


Hidden turnouts (track switches) will be controlled by switch motors mounted above the plywood, while exposed turnouts have their machines mounted underneath.  Turnouts aren't glued, but spiked down so they could be replaced if they fail.  Here's a pair of turnouts and a switch motor:


The motor is mounted to the underside of the turnout;  a rectangular hole is cut through the Homa-Bed and plywood.  Here's one ready to mount in place:

...and placed:


One of the spikes used to hold the turnouts in place:

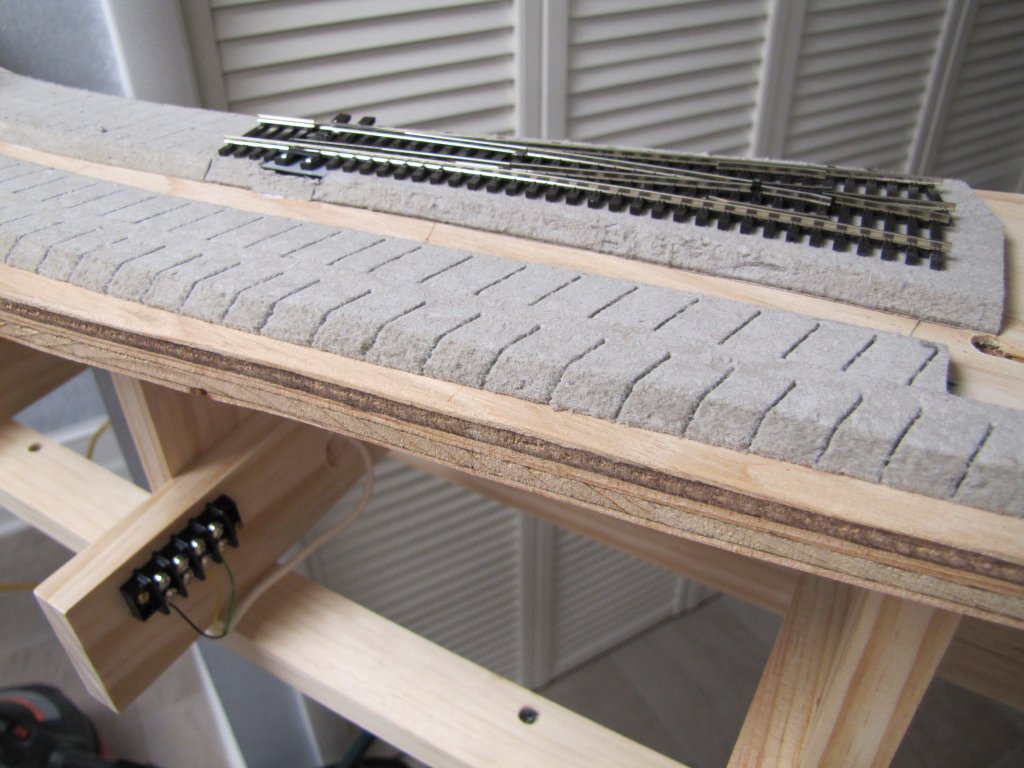
I don't like soldering, because I've never mastered it!  Despite this, most rail joints are soldered for strength.  The track is fed from an electrical buss underneath;  feeder wires are soldered to each track section.

The first sign of something "scenic" - the exposed track is airbrushed at this point, to color the crossties a dirty brown, and to lessen the "plastic" look.  This is done now because as the track is "brought into service", it is prepped with a 3 step sanding (600, 1000 & 1200 grit), vacuumed, then burnished with a stainless steel washer, and finally the railhead is polished with Maas Metal Polish.  I'm told that this burnishing and polishing process keeps the track cleaner than the more common "scrub it with an abraisive pad" method - it makes sense to me - no fine scratches for dirt to cling to - time will tell.  Much more detail is yet to come on the track, but this painting needs to be done before sanding and polishing.
Ooohhh, are those trains?!?  Can a video be far behind?

Friday, August 6, 2010

Plywood makes an appearance

Tired of looking at my dimensional pine?  Here's some fir plywood for you!


This is the "subroadbed" for the tracks.  (You can also see 2 of the 3 steel leg sets in these photos.)  I've completed the plywood subroadbed in the isolated area above, which will eventually be a coal mining operation, the narrow section and lower level loop below:

...and a swing gate to connect them:


The lower level will not be seen in the finished model, there will be tracks and scenery above it.  This lower level will serve as "hidden staging" - up to 4 trains will be staged here, ready to be called on to negotiate the hidden loop, cross the swing gate, then climb at a 2% grade (about 1.1 degrees) to the upper, exposed level.  You can see that climb in the 1st photo - actually, the grade starts about 6" into the swing gate.

This alignment of subroadbed is the most critical of the entire railroad;  I decided to get it out of the way first, and it took a lot of time to get it right. But, I'm happy to say, it's right!

Next up will be some roadbed & track on this area - and where there's track, there will be trains!  Gotta test, right?  Also coming soon, beginning the electrical work, and hanging the backdrops on the walls, while I can still reach them.